micropython+esp32(更新中)
网络卡顿无法加载图片请访问备用网址
描述
之前做物联网项目使用了 micropython+esp32 ,现在手里刚到了新的板子和一批外设,想过一遍例程 ,再转入espidf深入学习。
教程
Python+ESP32 快速上手(持续更新中) wifi 蓝牙 智能控制 单片机_哔哩哔哩_bilibili
esp 32 电路图
Schematic Prints (itprojects.cn)
esp332 技术规格书
esp_wroom_32_datasheet_cn.pdf (itprojects.cn)
开发环境搭建
1. Thonny 下载
https://thonny.org/
2. micropython 下载
3. 驱动下载
https://doc.itprojects.cn/0006.zhishi.esp32/01.download/esp32usbDriver.zip
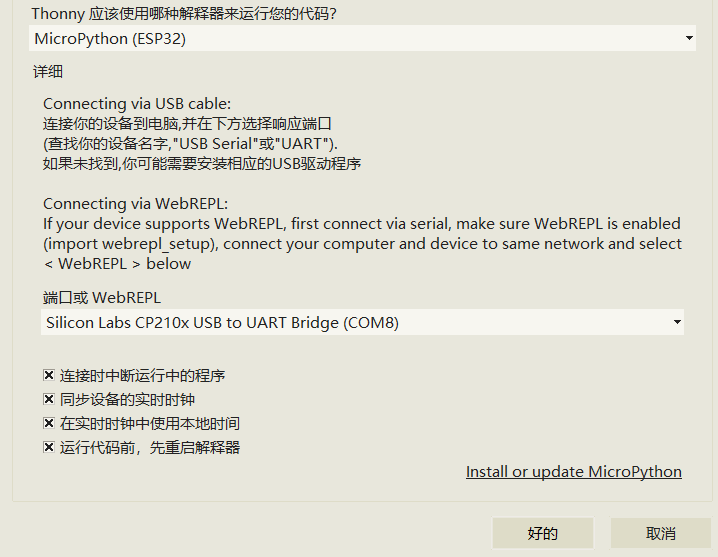
4. 烧录MicroPython到EPS32
运行-配置解释器-选择串口,点击 intall or update micropython ,找到固件 esp32-2022xxx.bin ,安装。
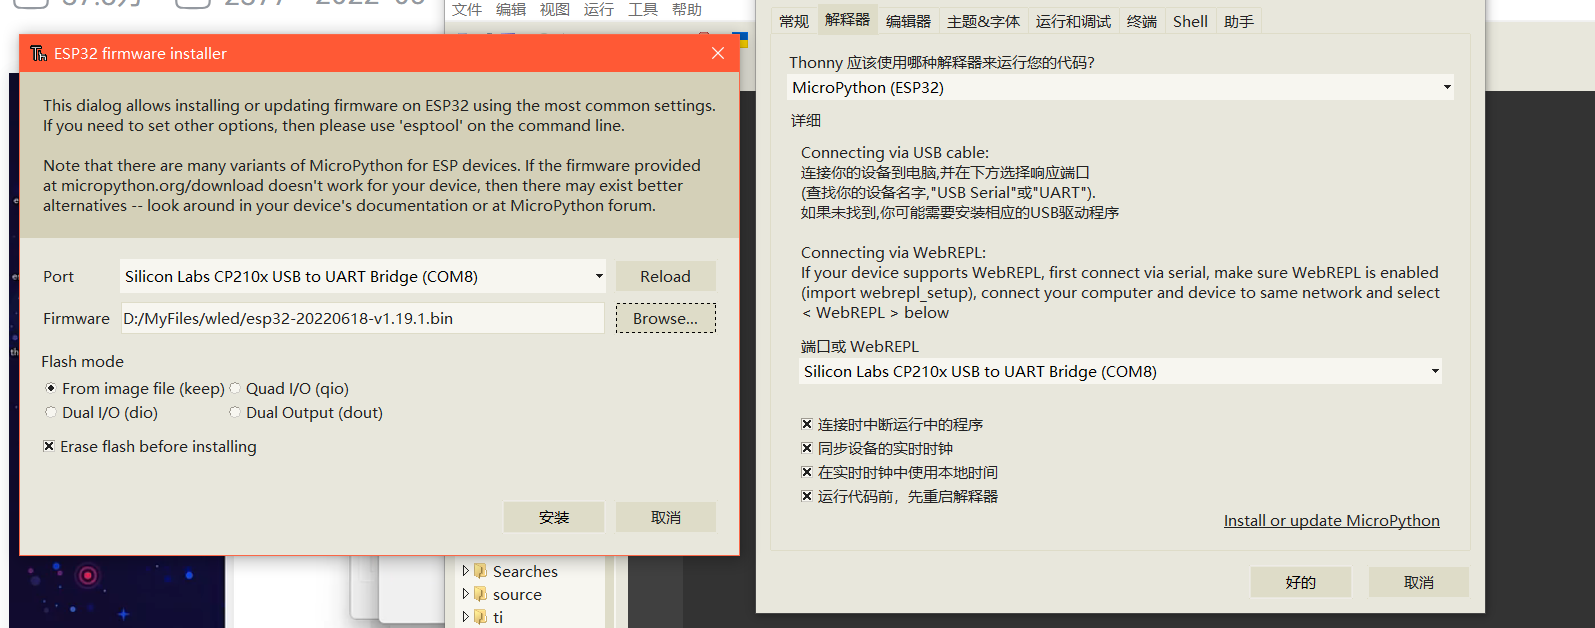
不要直接关闭配置解释器界面,回到配置解释界面,不然相当于没选串口了,点击“好的” ,成功运行
 命令行界面如下显示连接成功

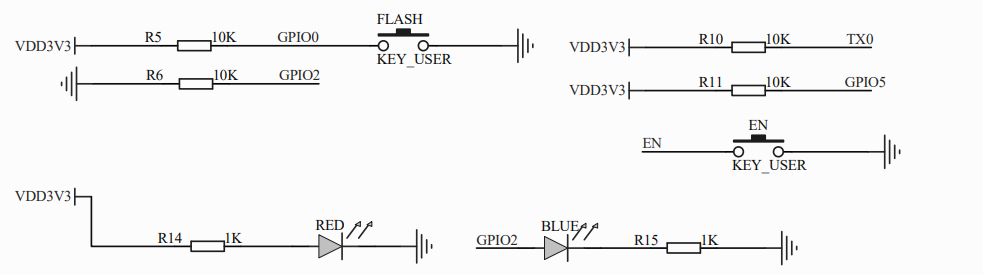
点亮 LED 灯
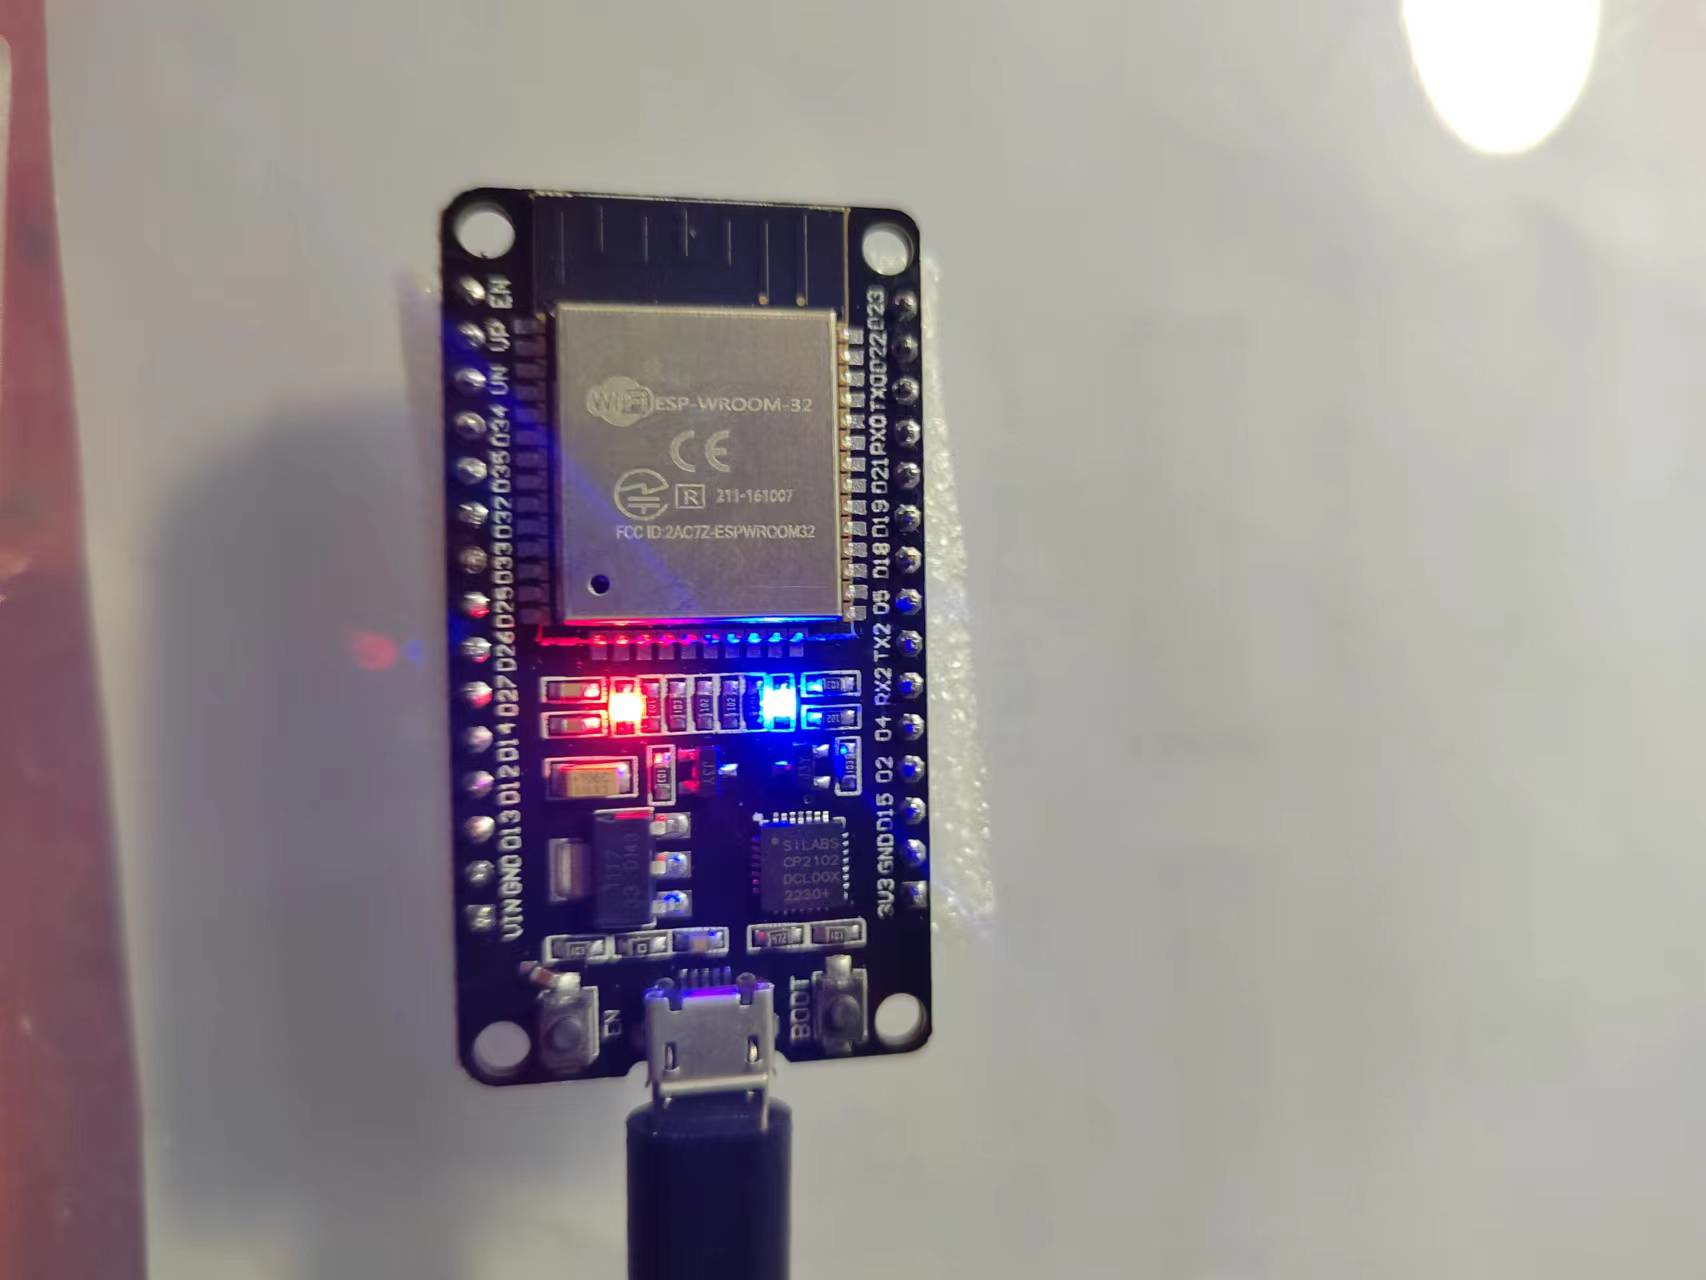
查看电路图观察灯与 LED 的连接管脚
转到 Micropython 官方文档,查找怎么设置电平
Quick reference for the ESP32 — MicroPython latest documentation
文档位置Quick reference for the ESP32 — MicroPython latest documentation
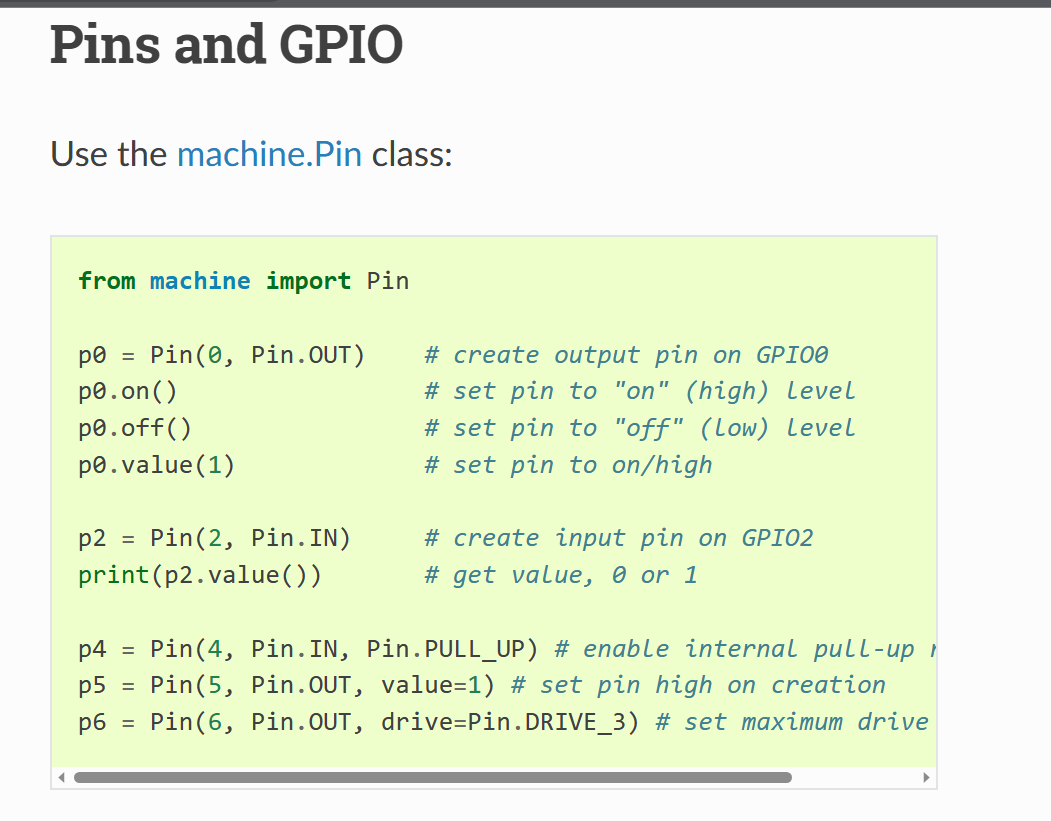
1 | from machine import Pin |
成功点亮蓝灯 ,效果如下:
PWM 呼吸灯
PWM(Pulse Width Modulation)简称脉宽调制
占空比越高灯越亮,循环改变占空比实现“呼吸”。
MicroPython官方文档:http://docs.micropython.org/en/latest/esp32/quickref.html
使用了machine 的 PWM 类
官方例程
1 | from machine import Pin, PWM |
实例
亮度
1 | from machine import Pin, PWM |
呼吸灯
1 | from machine import Pin, PWM |
呼吸灯效果如下:
链接 Wifi
Wi-Fi网络环境通常有两种设备
- Access Point(
AP) 无线接入点,提供无线接入的设备,家里的光猫就是结合WiFi和internet路由功能的AP。AP和AP可以相互连接。 - Station(
STA) 无线终端,连接到AP的装置,手机,电脑等需要联网的设备都是出于STA模式,这个模式不允许其他设备接入
官方示例
1 | import network |
实例
封装成函数
1 | import network |
局域网UDP链接
在连接 wifi 后测试局域网 UDP 通信
ESP32 发送 “hello world ” 给PC
1 | from socket import * |
最终效果

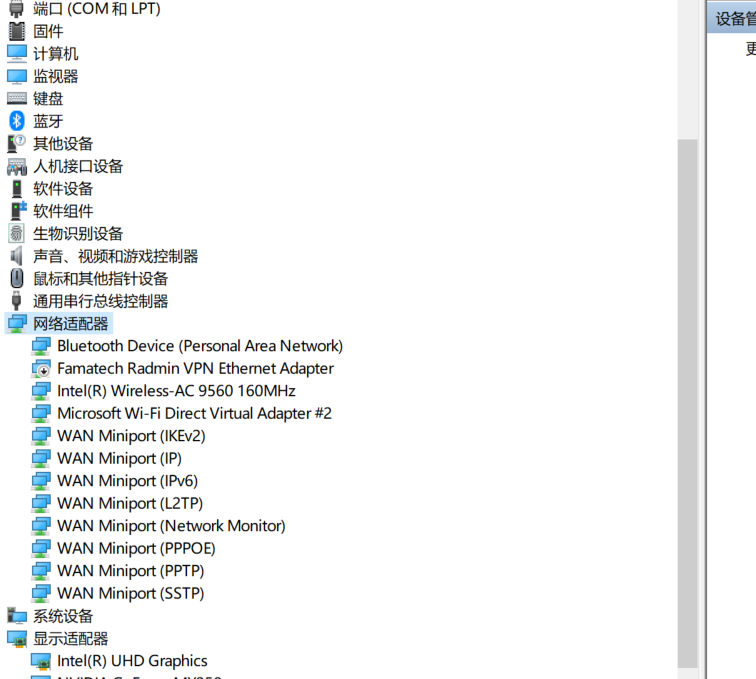
如果出现UDP 打不开的情况,找到设备管理器-网络适配器,查看是否开启虚拟机网卡或 LAN ,禁用
PC 发送 “nice to meey you ” 给 ESP32
建立UDP广播后可以与PC 进行 UDP 通信,注意先把上述代码第 5 步注释掉 ,再重新运行。
1 | recv_data = udp_socket.recvfrom(1024) |
注意远程主机填写,点击清除后复制 ESP32 的 IP 和端口
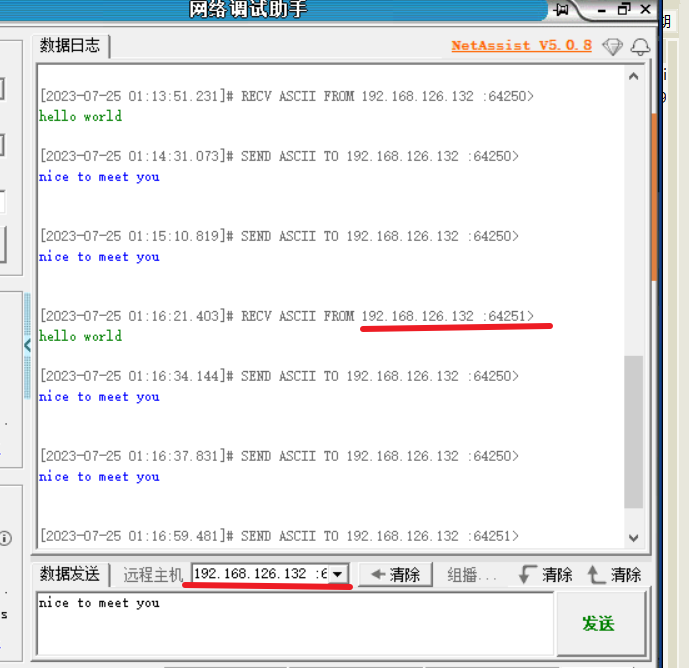
最终效果

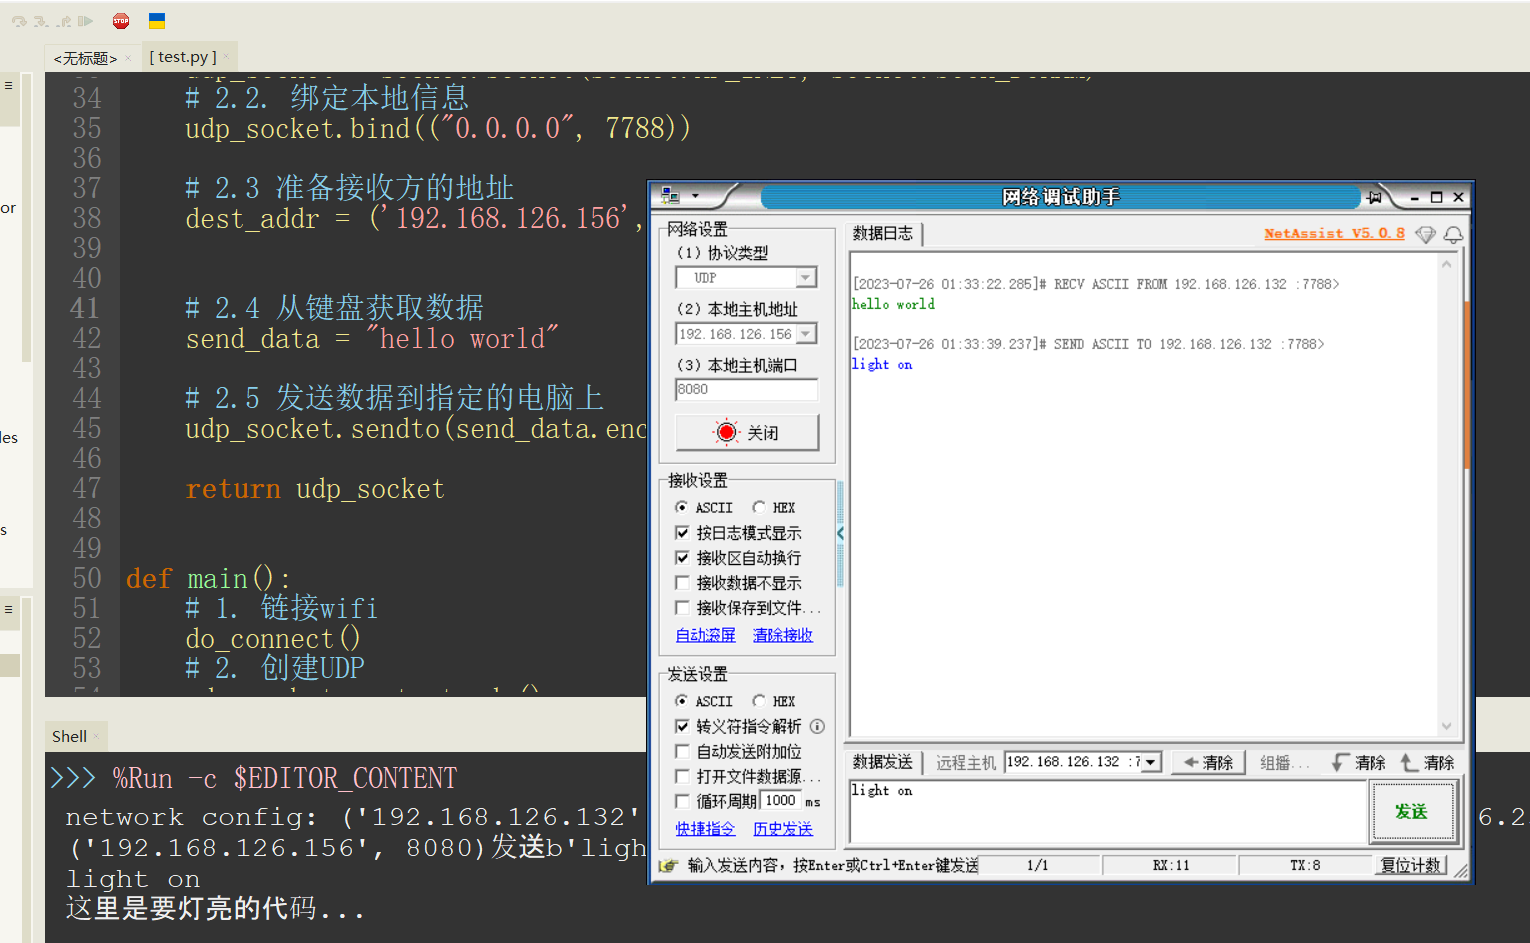
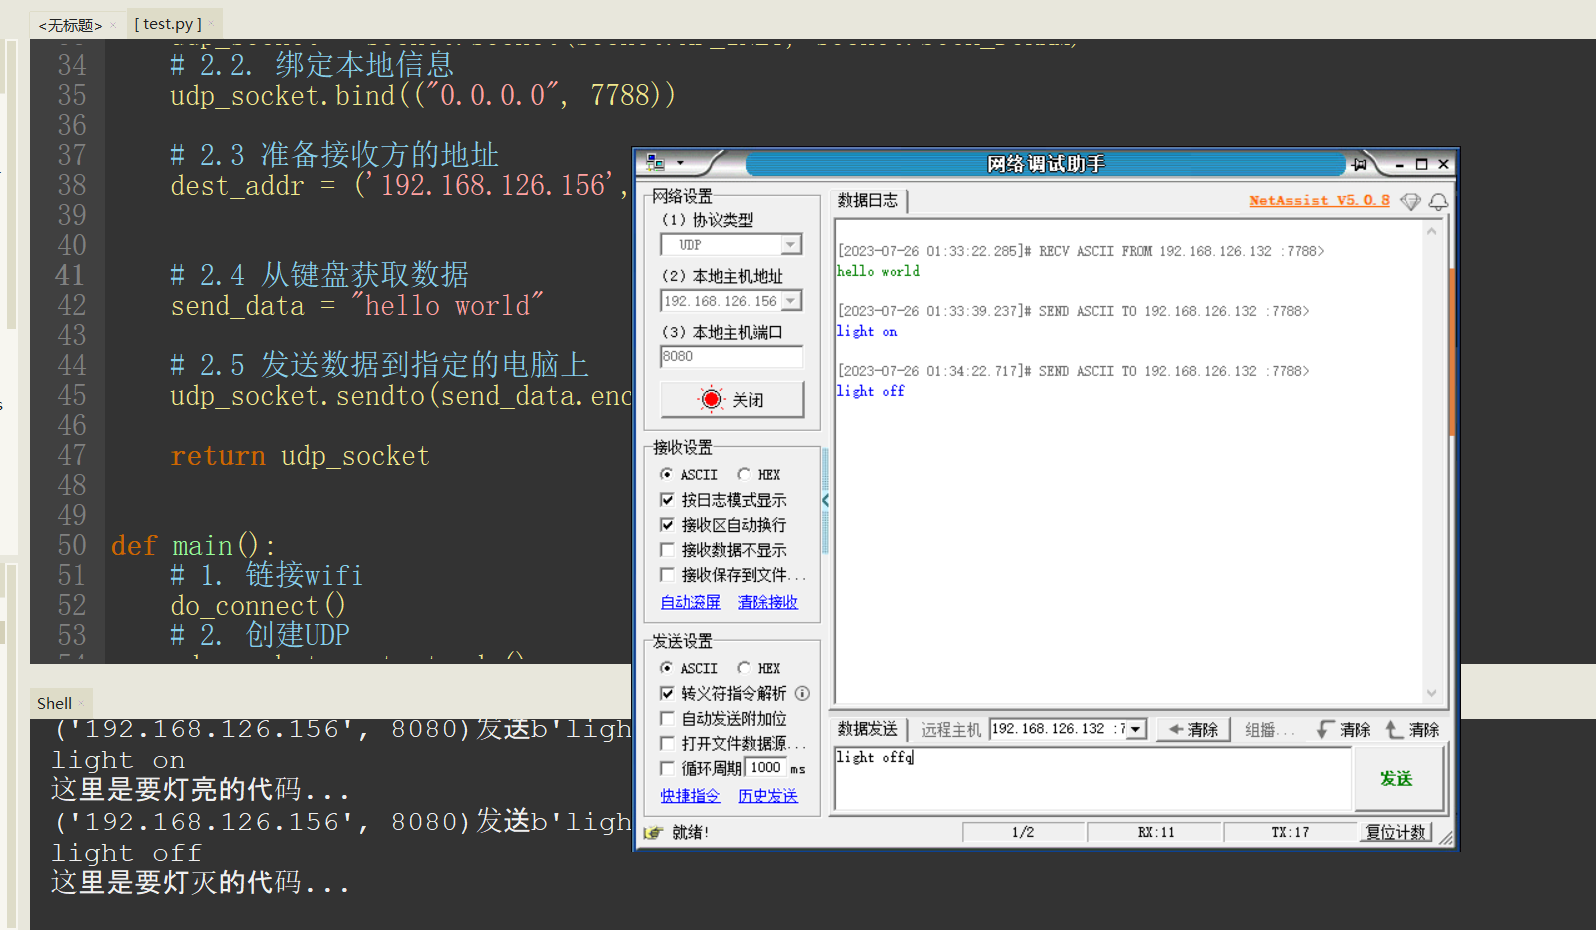
PC 控制 LED 灯
1 | # 整体流程 |
第 35 行 #2.2 udp_socket.bind(("0.0.0.0", 7788)) 在
esp32 上绑定端口,不然每次 UDP
广播时使用的端口都不一样,造成网络调试器每次要发送信息给 esp32
时都要修改端口
实例
1 | # 整体流程 |
最终效果
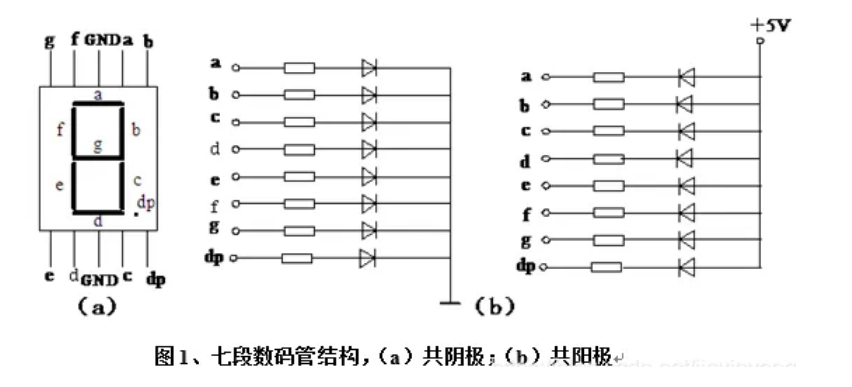
数码管显示
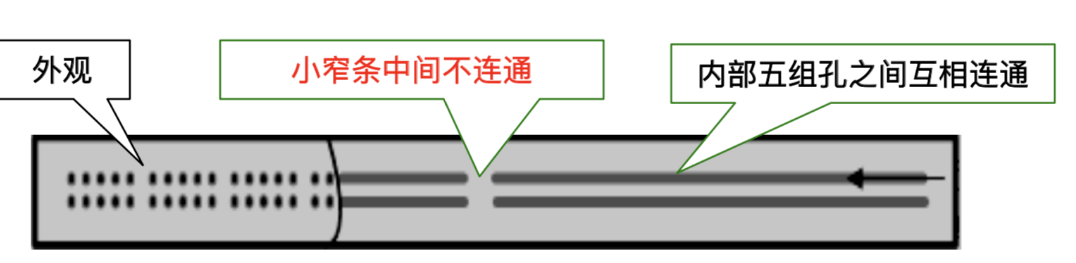
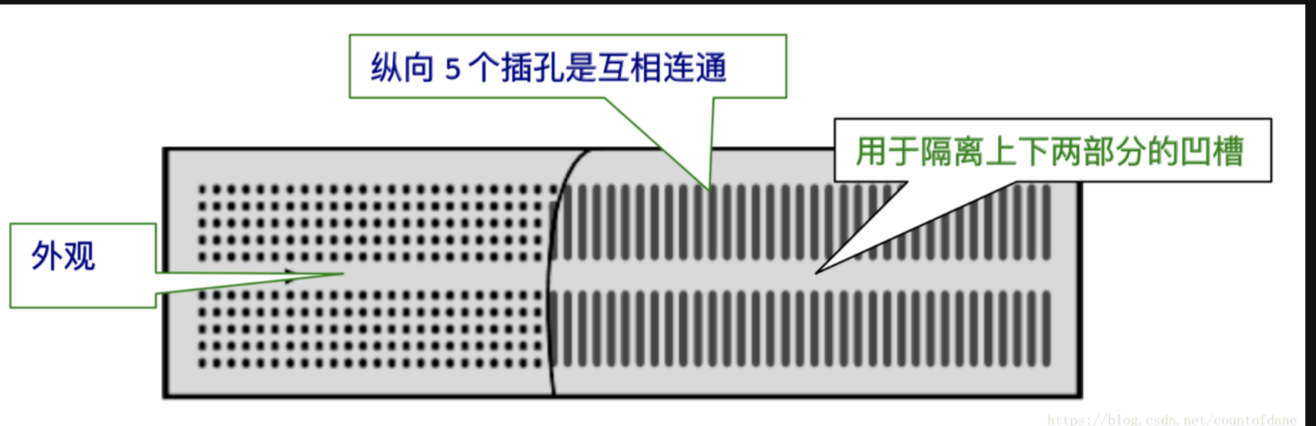
面包板使用
共阴数码管
1 | import machine |
32 行
if number_dict.get(number):
判断列表里是否有该索引的值
34 ~39 行
for bit in number_dict.get(number):
bit 是具体位的值(0/1),i 是 第 i 位(0~7)
问题
1、 数码管不亮:限流电阻过大
2、有的数字显示缺笔画: 电阻没插好或电阻引脚碰撞
最终效果
四位数数码管显示
四个七段数码管共用 a~h ,因此只能同时有一位有效
这个代码通过循环位选操作,循环点亮四个位
第一次运行例程发现显示乱码,发现原作者所用的是共阳极数码管,而自己手里的四位数码管是共阴极,低电平有效.因此需要将 value(0) 、value(1) 交换
实例
1 | import machine |
66 行的延时是用来确定频闪
72 循环是用来校正时间间隔为1s左右
计数间隔是由这两个循环的延时积得到
最终效果

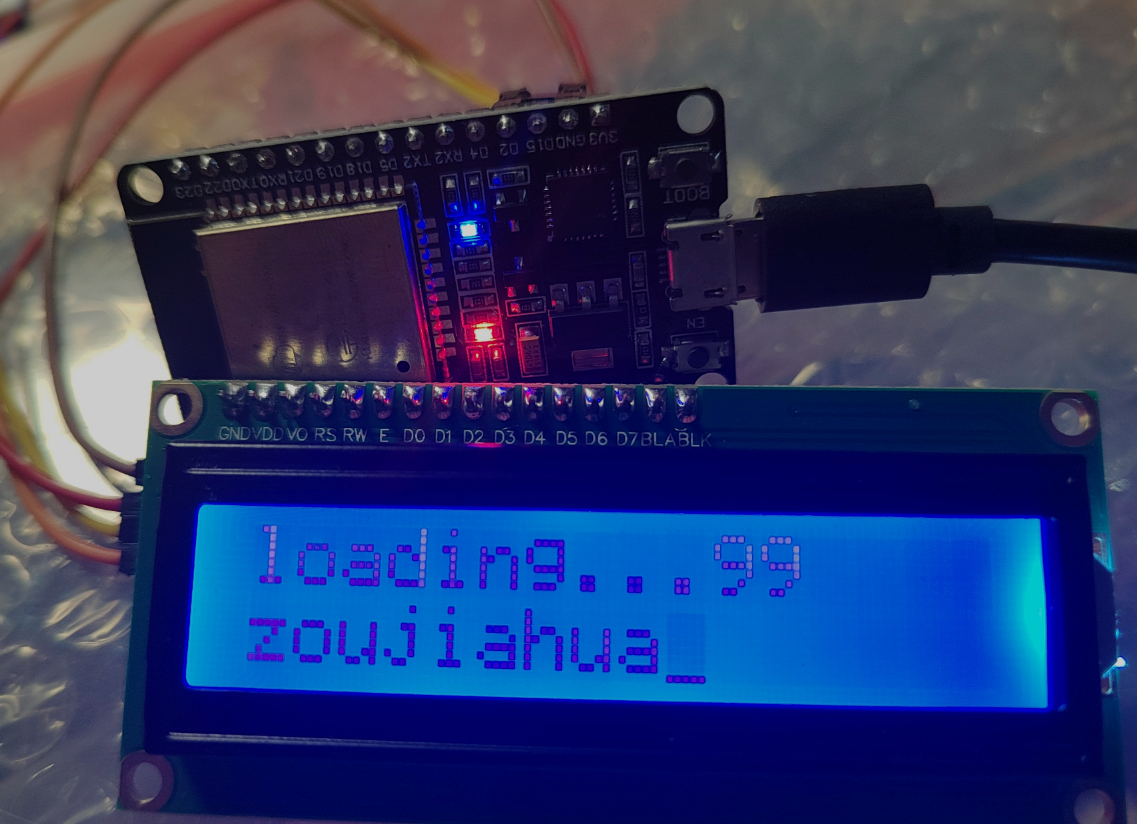
1602LCD与I2C
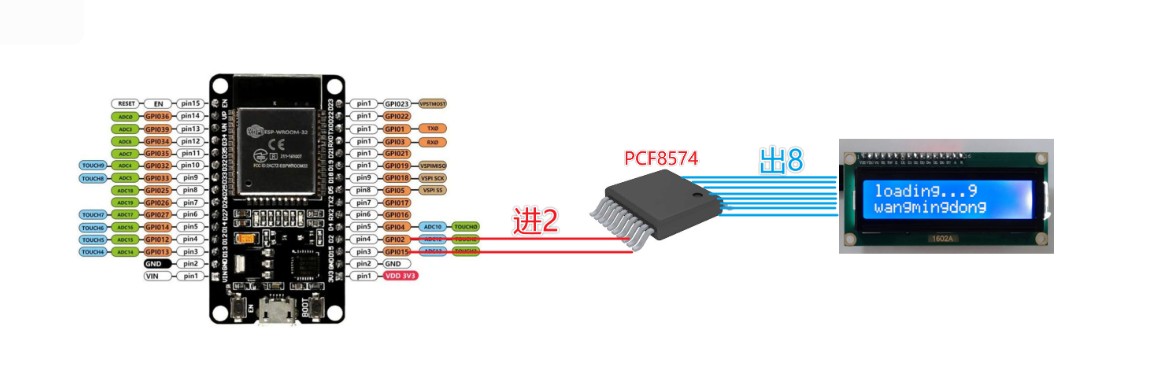
1602LCD
1602LCD是指显示的内容为16X2,即可以显示两行,每行16个字符液晶模块(显示字符和数字)
市面上字符液晶大多数是基于HD44780液晶芯片的
I2C
I2C(Inter-Integrated Circuit),中文叫集成电路总线,它是一种串行通信总线,使用多主从架构,是由飞利浦公司在1980年代初设计的,方便了主板、嵌入式系统或手机与周边设备组件之间的通讯。由于其简单性,它被广泛用于微控制器与传感器阵列,显示器,IoT设备,EEPROM等之间的通信。
最重要的功能包括:
只需要两条总线 所有组件之间都存在简单的主/从关系,连接到总线的每个设备均可通过唯一地址进行软件寻址 I2C是真正的多主设备总线,可提供仲裁和冲突检测 传输速度 标准模式:Standard Mode = 100 Kbps 快速模式:Fast Mode = 400 Kbps 高速模式: High speed mode = 3.4 Mbps 超快速模式: Ultra fast mode = 5 Mbps 最大主设备数:无限制 最大从机数:理论上是127
大白话:一种只用2根线就可以传递很多数据给其它多台设备的方法,这种方法叫I2C
大大减少了MCU上IO的使用
PCF8574
PCF8574 是 NXP公司生产的一款芯片。该芯片可以通过IIC协议进行IO口扩展。每个IO口可以单独的分配为输入或者输出。例如,作为输入时,可以用于监控中断或者键盘。作为输出时,可以用于点亮发光二极管。系统控制器可以通过单独的寄存器读取输入端口状态或者配置输出端口状态。
因为该芯片具有三个地址管脚,也就是最多可以同时分配8个地址。所以,在同一个系统中,最多可以通过16个管脚拓展出128个IO口。此外,该芯片还提供一个中断管脚(低电平有效)。当任何一个输入管脚和其对应的寄存器状态不同时,触发该中断。
为了节省电能,PCF8574内部没有在地址管脚放置上拉电阻,因此,这几个地址必须外部置高或者置低。这些地址管脚可以直连或者通过一个电阻连接到VCC或者GND。
Micropython官方文档(IIC)
Quick reference for the ESP32 — MicroPython latest documentation
需要的api、驱动模块
lcd_api.py:https://doc.itprojects.cn/0006.zhishi.esp32/01.download/lcd_api.pyesp32_i2c_1602lcd.py:https://doc.itprojects.cn/0006.zhishi.esp32/01.download/esp32_i2c_1602lcd.py
1 | """Provides an API for talking to HD44780 compatible character LCDs.""" |
1 | """Implements a HD44780 character LCD connected via PCF8574 on I2C. |
实例
1 | import time |
最终效果
ST7789、240x240彩屏幕与SPI
240*240接口
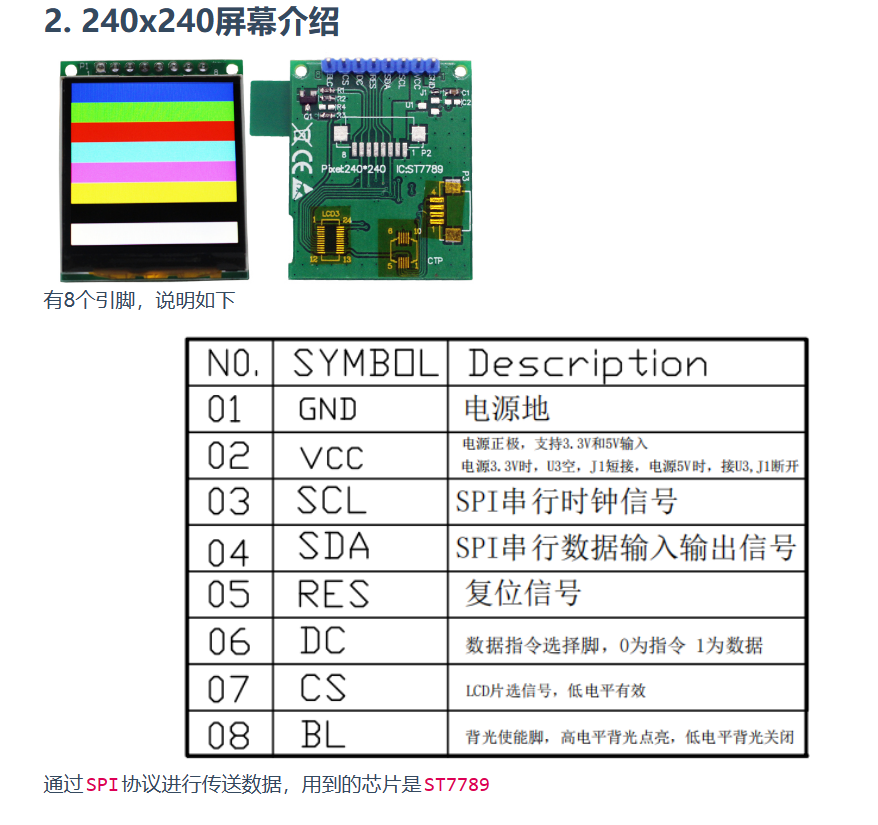
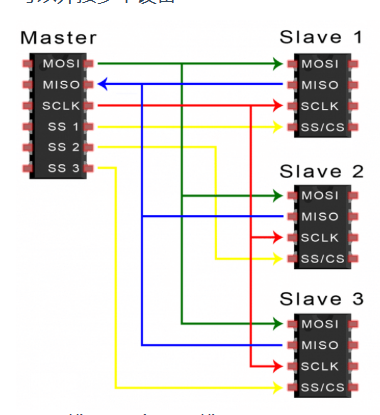
SPI
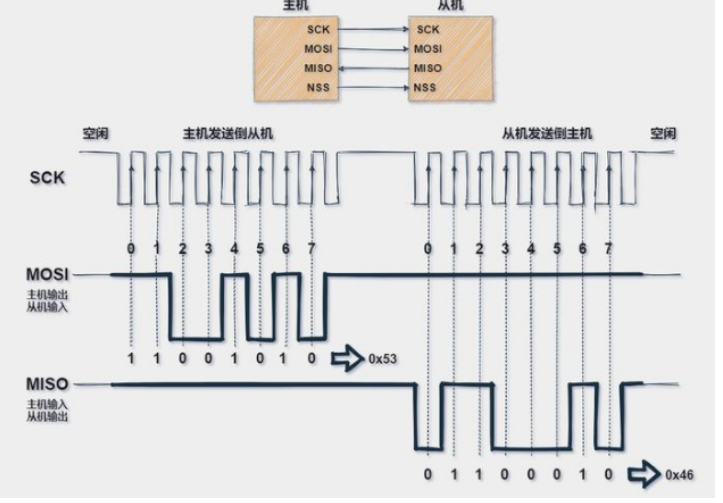
SPI使用四根线实现快速数据通信,
理论上,SPI是一种全双工的通讯协议
SPI通讯无起始位和停止位,因此数据可以连续流传输而不会中断;没有像I2C这样的复杂的从站寻址系统,数据传输速率比I2C更高(几乎快两倍)。独立的MISO和MOSI线路,可以同时发送和接收数据。
在SPI协议中,设备分为主机与从机。主机是控制设备(通常是微控制器),而从机(通常是传感器,显示器或存储芯片)从主机那获取指令。
可以外接多个设备
其他制造商可能会遵循其他命名规则,但是最终他们指的相同的含义。以下是一些常用术语;
- MISO也可以是SIMO,DOUT,DO,SDO或SO(在主机端);
- MOSI也可以是SOMI,DIN,DI,SDI或SI(在主机端);
- NSS也可以是CE,CS或SSEL;
- SCLK也可以是SCK;
驱动下载
st7789py.py库:https://github.com/russhughes/st7789py_mpy
- 下载st7789.py文件:https://doc.itprojects.cn/0006.zhishi.esp32/01.download/st7789.py
- 将
st7789py.py文件中的204、205行 注释
代替方案
- st7789.py:能够快速的驱动240x240屏幕,但功能少,不能显示图片
- st7789py.py:能够显示图片、文字灯,但是每次重新上电后,屏幕容易不亮
综上所有,对st7789.py进行了升级,添加图形库功能,这样一来就可以用一个文件,删除st7789py.py即可
新 st7789(推荐用)
https://doc.itprojects.cn/0006.zhishi.esp32/01.download/new/st7789_itprojects.py
旧st7789(弃用,原因:ST7789芯片更新后添加了伽马值,导致彩色失真)
https://doc.itprojects.cn/0006.zhishi.esp32/01.download/st7789_itprojects.py
st7789.py
1 | import ustruct |
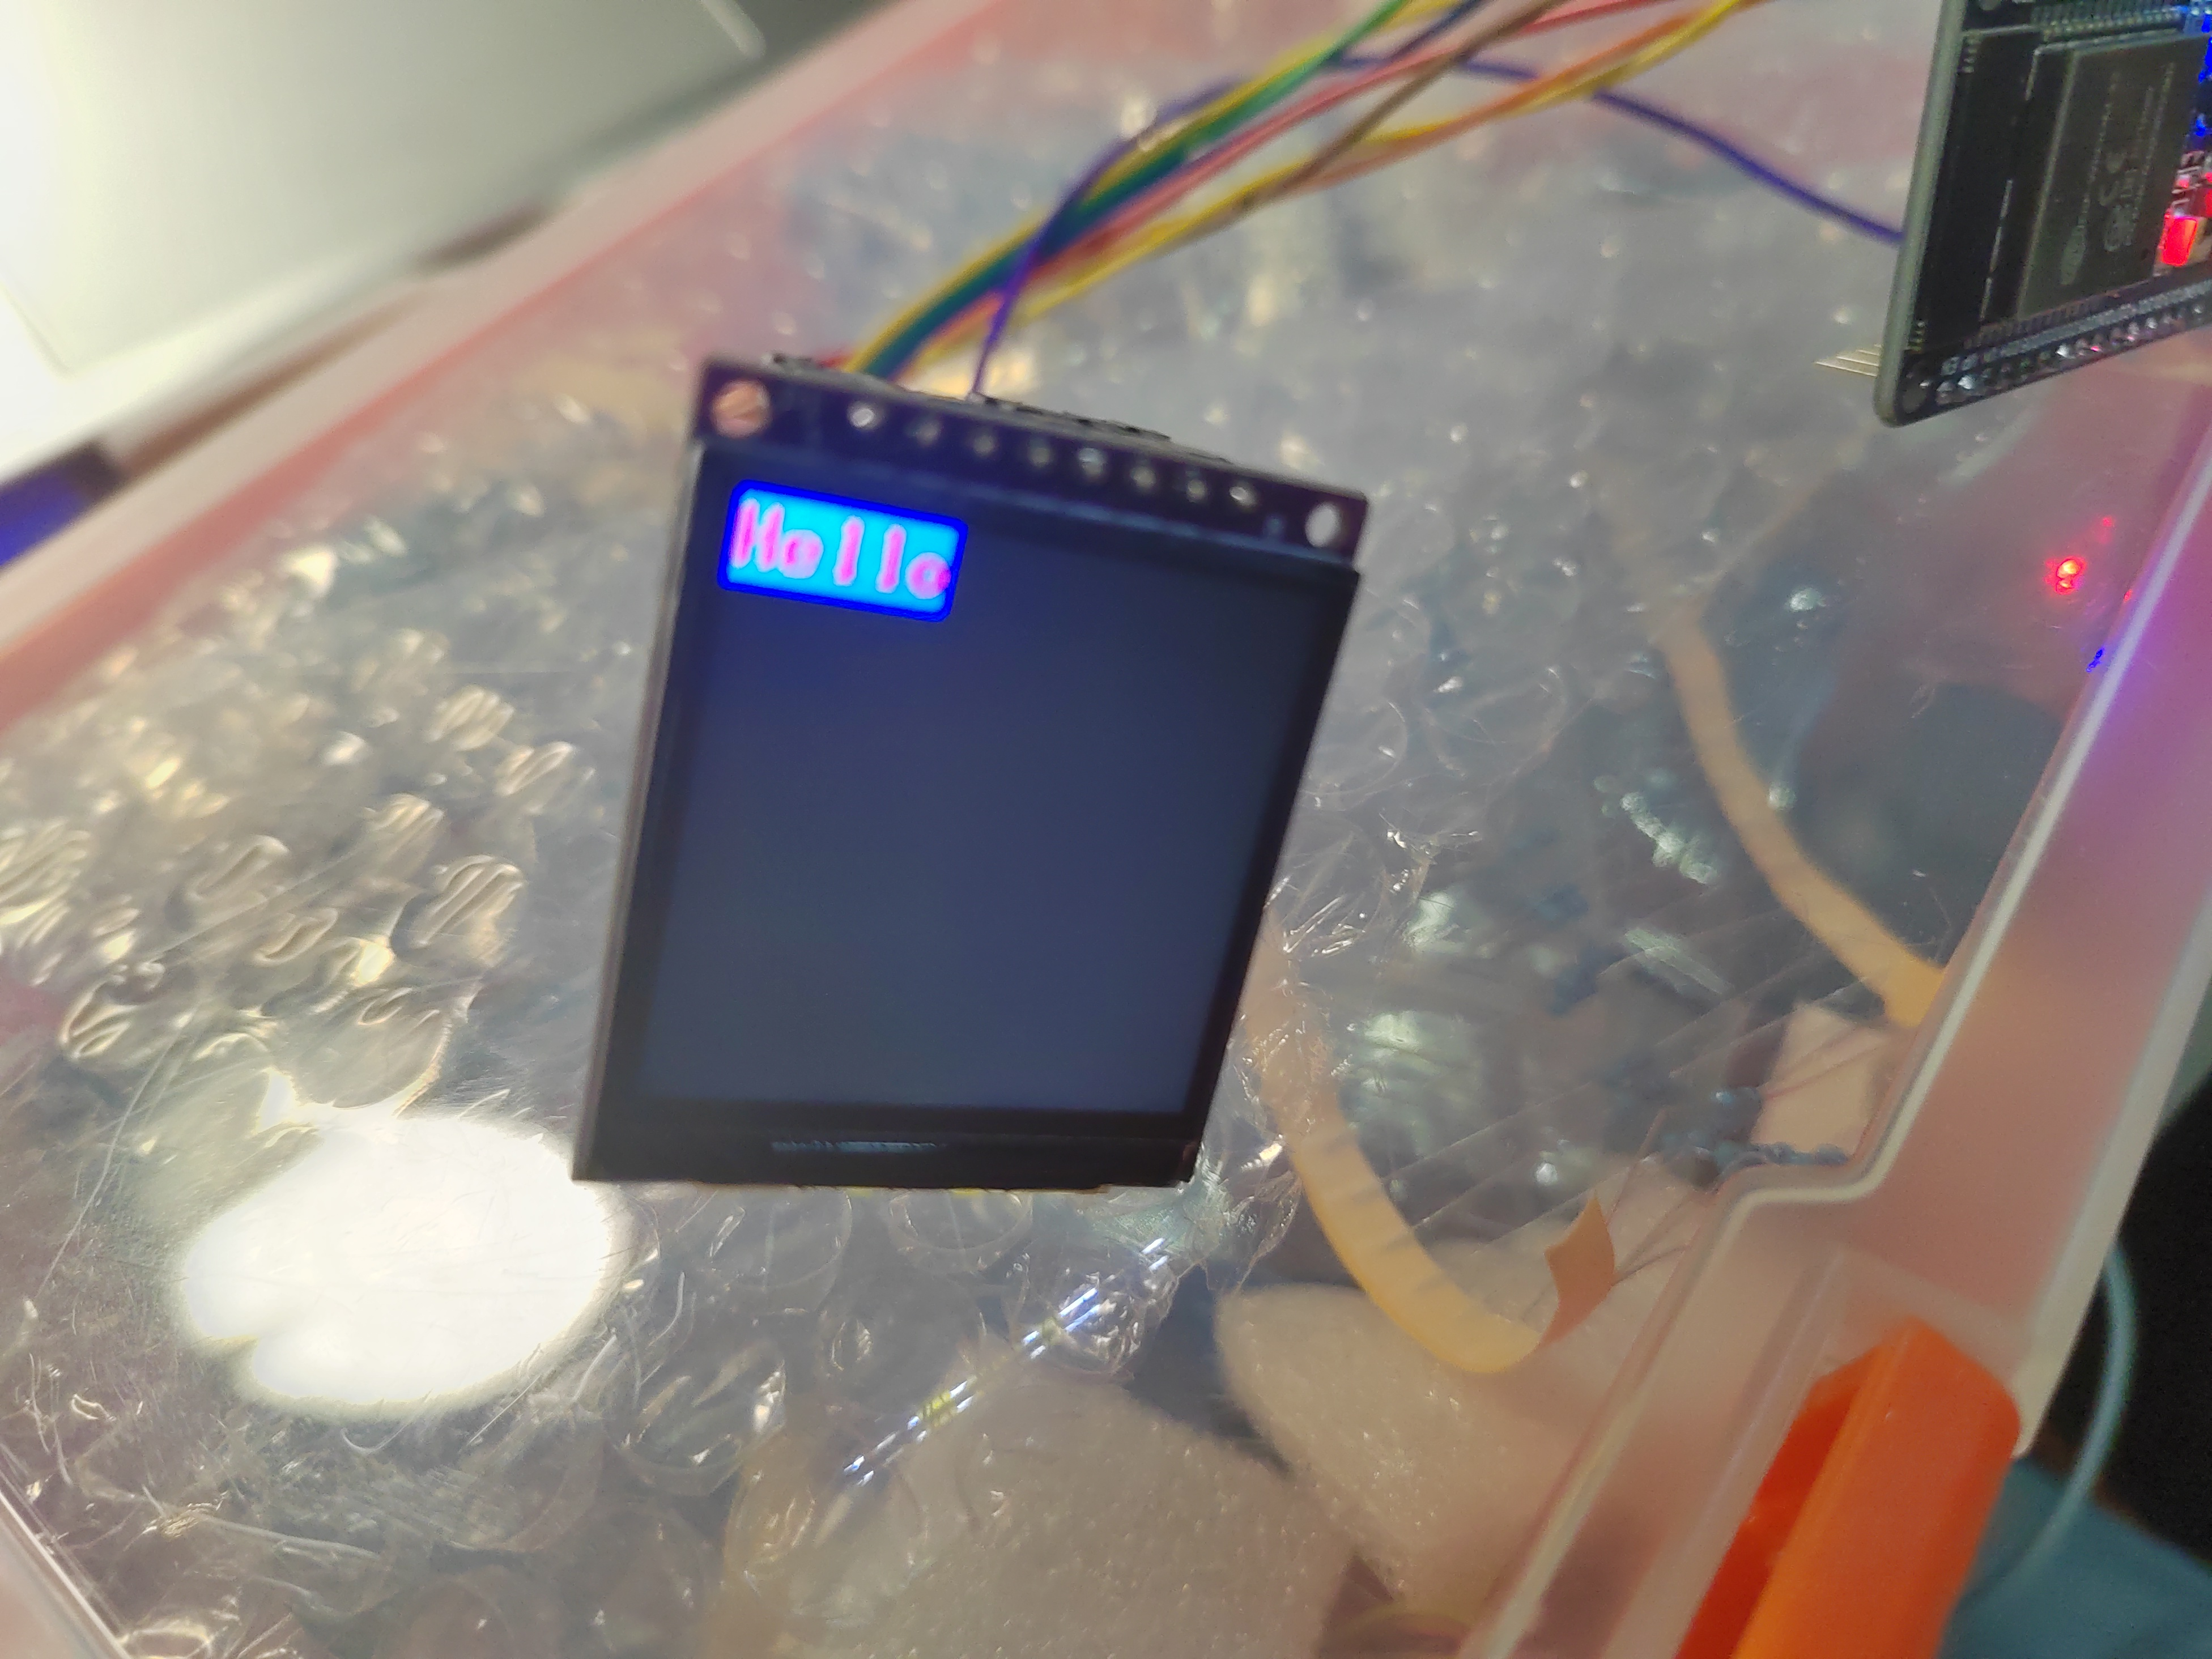
实例-打印 "hello "
1 | import random |
最终效果-打印 "hello "
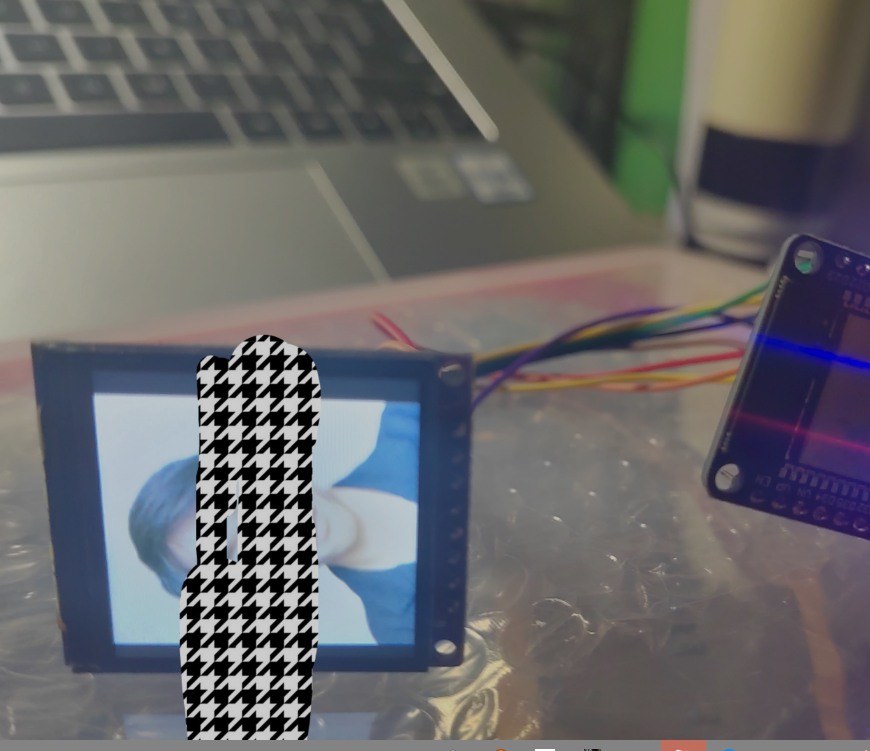
实例-打印图片
由于图片过大,需要将图片转为 dat 格式 ,并上传 esp32
第一步, 在本地转化格式
1 | import struct |
第二步 , micropython 开启TCP 服务作为服务端
1 | import time |
第三步本地客户端上传转化后的数据给 esp32
1 | from socket import * |
第四步-esp32 显示图片
1 | from machine import Pin, SPI |
最终效果-打印图片